Pin assignment
From Fpga4u
| Be sure to set unused pins as input!!! Assignments --> devices --> device & Pins Options --> Unused Pins --> As input tri-stated with weak pull_up resistor |
After completing either a block diagram or a VHDL file and if you want to program your board, you have to direct the inputs and outputs of your system to the physical pins of the board. To that end, Quartus II offers the Pin Assignment tool.
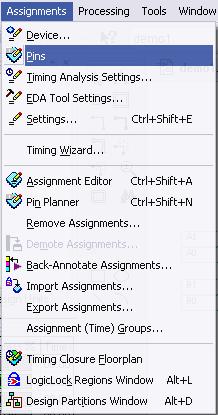
- To use it, click on Assignment->Pins (be sure to have synthesized your design at least once before assigning the pins or Quartus won't recognize your inputs and outputs)
- Double-click on the Location column near each node name to set the pins location. Refer to the following table and at the column corresponding to your FPGA4U board. Look at the board descriptions and the excel file provided below for a complete list of the available pins.
| Name | FPGA4U Pin Location |
FPGA4U DE0 Pin Location |
|---|---|---|
| A0 | G7 | B12 |
| A1 | H8 | D12 |
| B0 | E9 | B11 |
| B1 | F10 | C11 |
| Z0 | H7 | D9 |
| Z1 | C7 | C9 |
| Z2 | G8 | E9 |
| Z3 | E8 | F9 |
Inputs A and B are mapped on the Switch 0 (the switch on the top). Input A is mapped on bits [1..0] and B to [5..4]. The output Z is mapped to Switch 1 on bits [3..0].
- Compile your design
An other way to assign your pins is to set a default assignment with a .tcl script.
TCL script for pin and default assignement
A default assignment can be performed with a tcl script, multiple TCL scripts are available at the bottom of this page. Select the one corresponding to your FPGA4U board.
- Copy the TCL file in your project directory
- In Quartus II, open the tcl windows -> (Alt-2), a window will be open in the general bottom right Quartus II window
- Type: source filename.tcl
- You can verify the assignment done in the Assignments -> Pins window
Files
- Excel file pin assignments
- FPGA4U pin assignment
- FPGA4U DE0 pin assignment.
- TCL Script pin assignments
- FPGA4U simple TCL script.
- FPGA4U full TCL script, with pin numbers with more than 1 name, especially for extension connectors.
- FPGA4U DE0 TCL script.